Lithium drill batteries have revolutionized the world of power tools, offering longer life, faster charging times, and consistent power output.
However, like all batteries, lithium drill batteries can encounter issues. If your battery won’t charge, don’t panic just yet.
There are several potential solutions to try before you consider replacing your lithium battery. In this post, we’ll explore eight common reasons your lithium battery is not charging and how to fix them.
Why Is My Lithium Drill Battery Not Charging?
Before we dive into the solutions, it’s important to understand why your lithium drill battery may not be charging properly.
- Age: Like all batteries, lithium batteries have a limited lifespan. With repeated use and charges, the battery’s capacity will eventually diminish, and it may no longer hold a charge.
- Faulty Charger: If your charger is damaged or malfunctioning, it could prevent your battery from charging properly. Always make sure to use the correct charger for your specific drill model.
- Dirty Battery Contacts: The metal contacts on your battery and charger can become dirty, preventing proper connection and the ability to charge. Clean them with a cotton swab and rubbing alcohol to ensure a good connection.
- Internal Damage: If your battery has been dropped or exposed to water, it may have internal damage that prevents it from charging properly. In this case, the best solution may be to replace the battery.
- Faulty Battery: Sometimes, your battery may be faulty and need to be replaced. This is more likely to happen with cheaper or off-brand batteries.
8 Solutions for Fixing a Lithium Drill Battery That Won’t Charge
Now that we understand some common reasons why your battery may not be charging, let’s explore possible solutions to get it working again.
Jumpstart the Battery
One of the first solutions to consider when your lithium drill battery won’t charge is to jumpstart it. Sometimes, lithium batteries can become so heavily discharged that the charger fails to recognize them.

To jumpstart the battery, you can use a fully charged lithium battery. Carefully connect the charged battery’s positive terminal to the dead battery’s positive terminal and the negative to the negative.
Let them sit connected for a few minutes. This process might give the dead battery enough initial charge for your charger to recognize and start charging it. Remember to handle batteries with caution to avoid short-circuiting or damage.
Check the Charger Connection
Check if the charger works correctly before assuming your lithium battery is faulty. Sometimes, the issue could be with the charger rather than the battery itself.
You can test this by using another battery on your charger or trying a different outlet. If the charger is faulty, replace it with a new one to ensure proper charging for your lithium drill battery.
Use an Appropriate Charger
Another crucial factor is whether you use the appropriate lithium drill battery charger.
Different batteries require specific chargers; using the wrong one can prevent your battery from charging properly or potentially damage it.
Ensure that the voltage and current specifications of the charger match those required by your battery.
Additionally, some chargers are designed to work with particular brands and models of batteries. For instance, Dewalt 60V drill batteries require a 60V FlexVolt charger, which is provided by Dewalt.
Using a manufacturer-recommended charger can help maintain the longevity and efficiency of your lithium battery. Always refer to the user manual or the battery’s specifications to verify compatibility before charging.
Clean the Battery and Charger Contacts
Dirty or corroded contacts can often cause charging issues with lithium-drilled batteries. Over time, dust, debris, and oxidation can build up on the battery and charger terminals, preventing a good connection.
To clean the contacts, ensure the charger and battery are turned off and disconnected for safety.
Use a clean, dry cloth or a soft brush to gently wipe away dirt or debris from the terminals. If there is noticeable corrosion, you can use a small amount of rubbing alcohol on a cotton swab to clean the contacts, but make sure it dries completely before attempting to charge the battery again.
Keeping the contacts clean ensures a secure and effective connection, which is crucial for properly charging your lithium drill battery.
Manual Reset
If your lithium drill battery still doesn’t charge after trying the previous steps, a manual reset could be the solution.
Some lithium-ion batteries include a built-in reset mechanism that can help restore functionality. To manually reset the battery, locate the reset button, often found near the battery contacts or under a small cover (as shown in the image below).
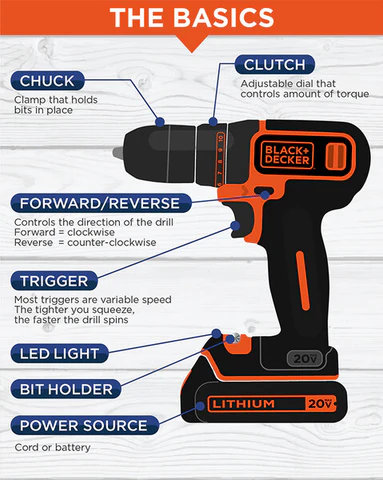
Press and hold the reset button for approximately 5 to 10 seconds. This process may reset the battery’s internal circuitry and resume normal charging.
If your battery lacks a reset button, consult the user manual for specific instructions related to your model or contact the manufacturer’s support for guidance.
Check Battery Voltage
Another crucial step in diagnosing a non-charging lithium drill battery is checking its voltage. Using a multimeter, measure the battery’s voltage to determine if it falls within the acceptable range.
A fully charged lithium-ion battery typically reads around 4.2 volts per cell. If the voltage is significantly lower, it may indicate that the battery is deeply discharged or has a cell failure.
To measure the voltage, set your multimeter to the appropriate voltage range and connect the positive lead to the battery’s positive terminal and the negative lead to the negative terminal.
If the voltage reading is abnormally low, gently recharge the battery on a low current setting if your charger allows it, or consider using a balance charger that’s designed for lithium batteries.
Pulse Charge the Battery
Pulse charging can effectively revive a lithium drill battery that refuses to charge through conventional means.
This technique involves using a charger that provides short bursts or pulses of electrical charge rather than a continuous flow to the battery.
These pulses help break through the internal resistance that prevents the battery from charging.
To pulse charge your battery, you need a pulse-capable charger like GOOLOO 6 Amp (as shown in the image).

Connect the battery to the charger and set it to pulse mode if available.
Allow the charger to pulse for a few minutes before checking the battery voltage. If the voltage rises, continue pulse charging until the battery reaches a safe level where it can be charged normally.
Always follow the instructions provided by the pulse charger manufacturer to avoid potential risks and ensure the safety of both the battery and yourself.
Boost the Battery
If your lithium drill battery still won’t hold a charge after trying the previous solutions, boosting the battery might be necessary.
Boosting, also known as battery conditioning, involves discharging and recharging the battery in a specific manner to improve its overall capacity and efficiency.
Some sophisticated lithium battery chargers have a “boost” or “condition” mode that you can use for this purpose. To boost the battery, fully discharge it in your drill until it no longer powers the device.
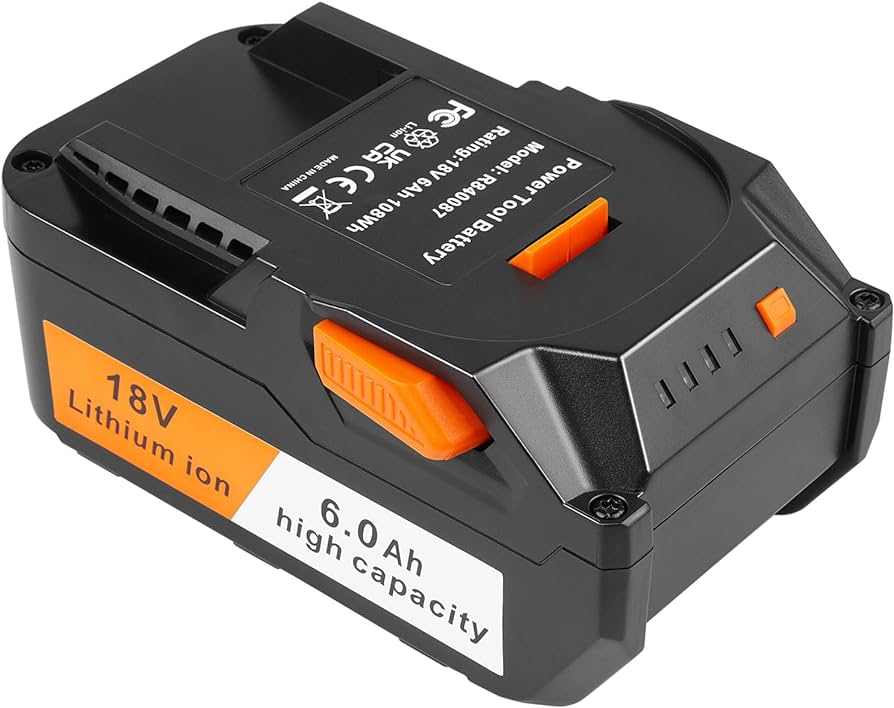
Next, place the battery on the charger and select the boost or condition mode if available. Allow the charger to complete the cycle, which may take longer than a standard charge.
This process can help recondition the battery cells, potentially restoring lost capacity and extending the battery’s lifespan.
Always refer to the charger’s manual for specific instructions on using the boost feature safely and effectively.
Contact Customer Service
If none of the previous methods have resolved your lithium drill battery charging issue, it may be time to contact customer service. For further assistance, contact the manufacturer of your battery or drill.
Provide them with as much information as possible, including your battery’s model and serial number, the charger you’re using, and a detailed description of the issue you’re experiencing.
Customer service representatives can often offer troubleshooting tips tailored to your specific model or even arrange repair or replacement if necessary.
Additionally, many manufacturers have a warranty policy, so check to see if your battery is still under warranty.
By working with customer service, you can ensure that you take the correct steps to resolve the problem and get the most effective support.
Conclusion
In conclusion, a lithium drill battery that won’t charge can be frustrating, but it doesn’t necessarily mean the end of its life.
By following these steps and trying different methods, you can revive your battery and continue using it for an extended period.
Always take necessary precautions when handling batteries and chargers and refer to the manufacturer’s instructions for proper use and maintenance.
If all else fails, don’t hesitate to contact customer service for further assistance. You can get your lithium drill battery back in working condition with patience and persistence.
So, next time you encounter this issue, try these solutions before completely giving up on your battery. Your lithium drill battery can continue serving you for years with proper care and maintenance.
