Power drills are essential tools for both DIY enthusiasts and professionals. They provide the power and precision needed for various tasks, from simple home repairs to complex construction projects.
However, like any tool, they can sometimes encounter issues. One common problem is when the drill’s light comes on, indicating power, but the drill itself won’t work.
In this blog post, we’ll explore the possible reasons behind this issue and provide step-by-step guidance on troubleshooting and fixing it.
Understanding the Basics
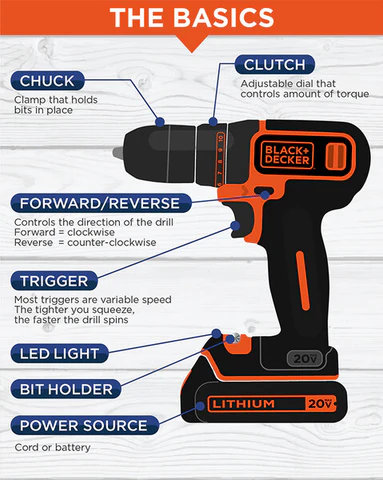
Before diving into the troubleshooting process, it’s important to understand the basic components of a power drill and how they function:
- Motor: The heart of the drill converts electrical energy into mechanical movement.
- Trigger Switch: Controls the flow of electricity to the motor.
- Battery (for cordless drills): Provides the necessary power.
- LED Light: Indicates that power is reaching the drill.
- Chuck: Holds the drill bit in place.
When the LED light comes on but the drill doesn’t operate, power reaches the drill but does not effectively power the motor.
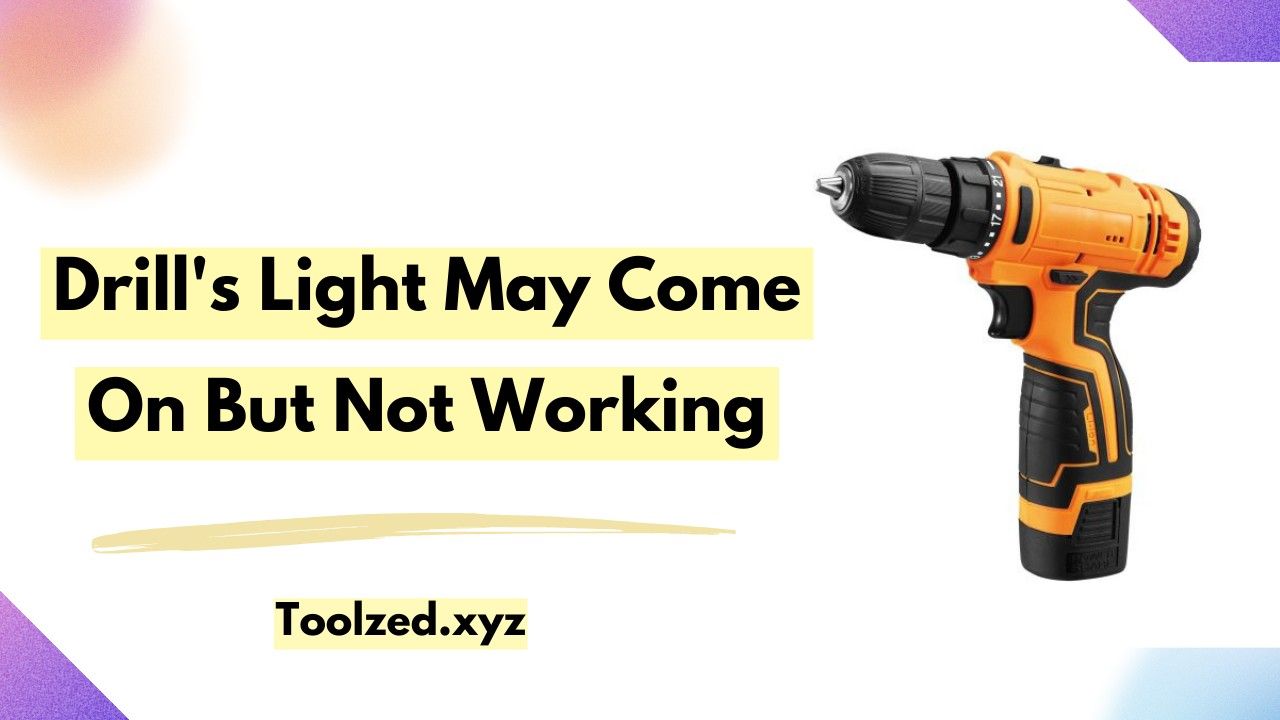
Drill’s Light May Come On But Not Working
Battery Issues
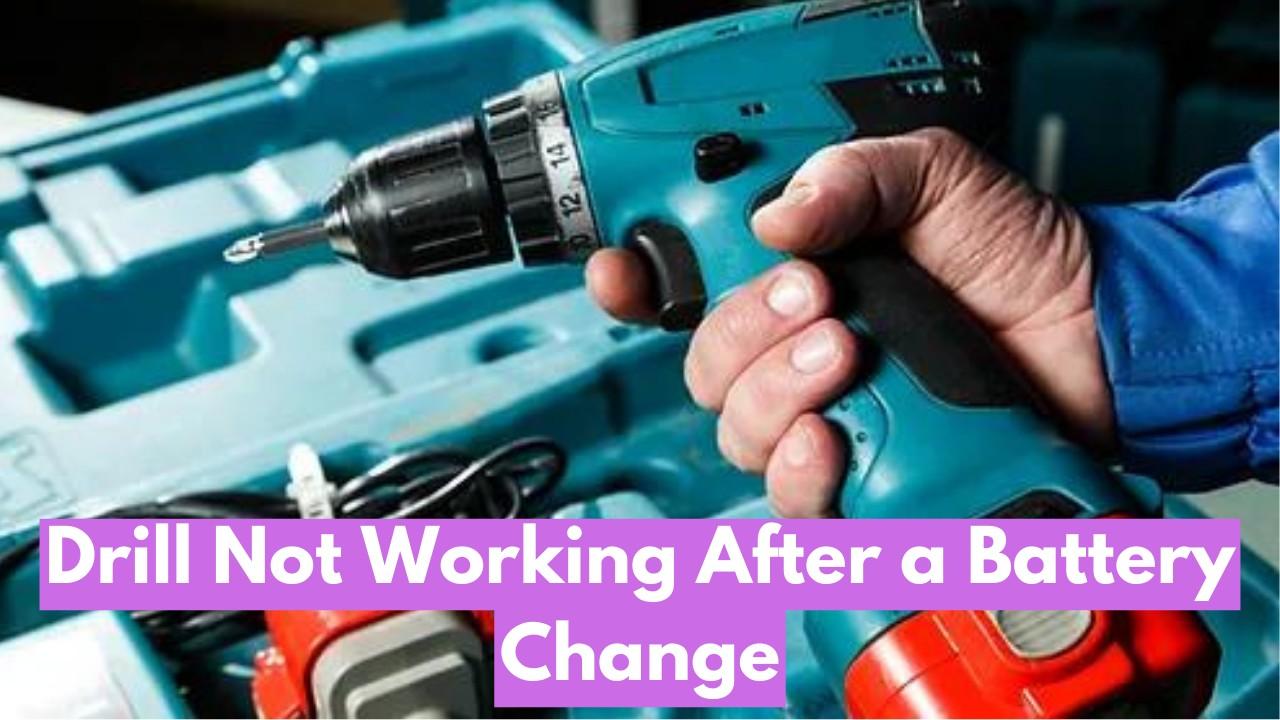
A problem with the battery is a common cause of cordless drills' failure to operate even when the light is on. Begin by ensuring that the battery is fully charged.
A partially charged or depleted battery may provide enough power to illuminate the LED light but not enough to run the motor. Try charging the battery fully and then testing the drill again.
If the battery is fully charged but the drill still won’t work, the issue may lie within the battery itself. Over time, Lithium-Ion batteries can degrade and lose their capacity to hold a charge.
You can use a multimeter to determine if the problem is with the battery. A multimeter is a versatile tool that can measure voltage, current, and resistance.
Set the multimeter to measure voltage and touch its probes to the battery terminals. If your battery is still good, it should read close to its rated voltage (e.g. 18V or 20V). If you get a significantly lower reading, then it’s likely that the battery needs to be replaced.
You can also check the battery by testing it with another tool that you know is working. If the battery powers the other tool but not your drill, then there may be an issue with the drill itself.
Trigger Switch Issues
Another potential cause behind a drill that won’t work but has a functioning LED light is a problem with the trigger switch.
This component controls the flow of electricity to the motor and can become damaged over time due to wear and tear.
To test if the trigger switch is the problem, use your multimeter to check for continuity. This means checking if electricity can flow through the switch when pressed.
If there’s no continuity, the trigger switch may need replacing. You can usually find replacement trigger switches at hardware stores or online retailers specialising in power tool parts.
Chuck Problems
The chuck is the drill part that holds the drill bit tightly in place. If your drill’s LED light is on but the motor doesn’t engage, the problem could be related to the chuck.
First, ensure the chuck is properly tightened and securely holds the drill bit. Sometimes, a loose chuck can make it seem like the drill isn’t working when, in fact, the motor is running, but the bit is slipping.
To diagnose this issue, attempt to manually rotate the chuck with your hand while the drill is off. If the chuck turns easily, it might be too loose.
You’ll need to tighten it properly according to the drill’s instructions. Furthermore, inspect the chuck for any signs of damage or debris. Dirt, dust, and wear over time can interfere with its ability to hold bits securely.
In some cases, the chuck itself may be faulty and require replacement. If tightening and cleaning the chuck does not resolve the issue, consider disassembling it to inspect its internal components for wear or damage.
Replacement chucks can usually be purchased from hardware stores or specialized tool parts suppliers and are often designed for easy installation. Always ensure that you follow the manufacturer’s guidelines for replacing this component.
Charger Problems
Another possible reason for a power drill’s light coming on but the drill not working could be an issue with the charger.
A faulty charger might not be properly charging the battery, even if it appears to do so. To test the charger, first inspect it for any visible signs of damage, such as frayed wires or scorched marks.
Additionally, check the charging port on the charger and the battery for dirt or debris that might obstruct the charging process.
If no visible damage is present, use a multimeter to test the charger’s output voltage. Set the multimeter to measure DC voltage and connect the probes to the charger’s output terminals.
The reading should be close to the charger’s rated output voltage. If the reading is significantly lower or there is no reading, the charger is likely defective.
Furthermore, if you have access to another compatible charger, try using it to charge your battery. If the battery charges successfully with the other charger and the drill operates normally, this confirms that the original charger is faulty and needs replacement.
Always use a charger that matches the specifications the drill’s manufacturer recommends to avoid any potential damage to your battery or drill.
Charge Overnight
If your power drill shows inconsistent performance, such as intermittent or short battery life, one practical step is to charge the battery overnight.
By giving the battery an extended period to charge, you ensure that it reaches its maximum capacity, which may be beneficial for batteries that haven’t been used for a while or have been subjected to partial charges.
Plug in your charger and allow the battery to charge for at least 8-10 hours. Once the battery is fully charged, reinsert it into the drill and test its functionality.
However, if the issue persists even after an overnight charge, you may need to investigate other components further or consider replacing the battery altogether.
Always refer to the manufacturer’s guidelines regarding maximum charge times to avoid overcharging, which can further degrade battery life.
Torque Troubles
If your power drill’s LED light is on but not working another possible issue is the torque settings. The torque setting on a drill determines the force with which the drill turns the screw or drill bit. If the torque is too low, the drill might not engage properly, even though the motor is running.
First, check the torque setting on your drill to address torque-related issues. Ensure it’s set to an appropriate level for the task at hand.
Different materials and types of screws require different torque settings, so refer to your drill’s manual for the recommended settings. Increase the torque setting incrementally and test the drill’s performance with each adjustment.
Additionally, inspect the clutch, which is responsible for adjusting torque. A malfunctioning clutch can result in torque problems, which can prevent the drill from working effectively. If you suspect an issue with the clutch, professional inspection or replacement might be necessary.
Armature Issues
The armature converts electricity into rotational motion in a power drill. If this component becomes damaged or worn, it can affect the drill’s functionality, causing it to not work despite the LED light being on.
To check if the armature is damaged, first disassemble your drill and locate the armature. Inspect it for signs of damage or wear, such as burnt wires or a warped shaft. If you notice any problems, it may need to be replaced.
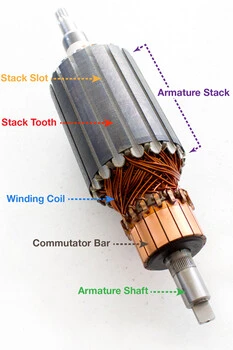
Replacing an armature can be a complex task and may require the help of a professional. If you decide to replace it yourself, always refer to the manufacturer’s guidelines and make sure you have the correct replacement part. Additionally, ensure the drill is disconnected from any power source before replacing the armature.
Broken Magnets
Magnets in a power drill play a crucial role in the motor’s functioning. These magnets provide the magnetic field that interacts with the armature to produce rotational motion.
If the magnets inside the motor break or dislodge, the drill may fail to operate correctly, even if the LED light is on and other components appear in working order.
To diagnose issues related to broken magnets, you must disassemble the drill and inspect the motor housing. Look for any signs of cracked, chipped, or completely broken magnets.
Additionally, ensure that the magnets are securely attached and not misaligned or dislodged from their original position.
If you discover damaged magnets, replacing them might be necessary. Unfortunately, replacing magnets can be challenging and delicate, often requiring precise tools and expertise.
In many cases, replacing the entire motor or seeking professional repair services might be more practical. Always consult the manufacturer’s guidelines and ensure the drill is disconnected from any power source before attempting repairs involving the motor magnets.
Carbon Brushes
Carbon brushes are small but vital components of a power drill’s motor. They conduct electrical current between the stationary wires and the rotating parts of the motor.
Over time, due to friction and constant use, these brushes can wear down, leading to poor electrical contact and diminished drill performance. In some cases, worn-out carbon brushes can cause the drill to stop working.
First, inspect the carbon brushes and ensure that the drill is unplugged and completely powered off. Disassemble the drill according to the manufacturer’s guidelines to access the motor. Locate the brush holders and carefully remove the brushes.
Check for signs of wear, such as shortened length, cracks, or excessive chipping. If the brushes appear worn or damaged, they must be replaced.
When replacing carbon brushes, use the correct type specified by the drill’s manufacturer, as using incompatible brushes can cause further damage to the motor.
After installing the new brushes, reassemble the drill and perform a test run to ensure proper functionality. Regular maintenance and timely replacement of carbon brushes can significantly extend the life of your power drill and enhance its performance.
Rotor Realignment
Another possible reason for a power drill not working, despite the LED light being on, could be the rotor becoming misaligned with the armature. The rotor is responsible for spinning the chuck, which holds the drill or driver bit in place.
To check if realignment is necessary, first disconnect and disassemble the drill according to the manufacturer’s guidelines.
Then, locate the rotor and armature and check for any signs of misalignment. The drill will not work properly if the two components do not align.
To realign the rotor and armature:
- Gently adjust the position of the rotor until it sits flush with the armature.
- Carefully rotate the chuck by hand to ensure it moves smoothly and without obstruction.
- Reassemble the drill and perform a test run to check if realignment has resolved the issue.
In some cases, realigning the rotor may not be possible, and replacing it might be necessary. Always refer to the manufacturer’s guidelines and seek professional help when dealing with rotor alignment issues.
Reverse Switch Problems
Some power drills come equipped with a reverse switch, allowing the user to change the direction of rotation. If this feature is not working correctly, it can affect the drill’s performance and cause it to not work despite having an LED light turned on.
First, disconnect and disassemble the drill according to the manufacturer’s guidelines to diagnose reverse switch problems.
Locate the switch and inspect it for any signs of damage or wear. If the switch appears to be damaged, it must be replaced.
Replacing a reverse switch can be a complicated task and may require the help of a professional. Always refer to the manufacturer’s guidelines and make sure you have the correct replacement part before attempting any repairs. Additionally, ensure the drill is disconnected from any power source before starting the replacement process.
Conclusion:
In conclusion, if your power drill is not working despite having an LED light turned on, it could be due to various reasons, such as a faulty armature, broken magnets, worn-out carbon brushes, rotor misalignment, or reverse switch problems.
It is essential to carefully diagnose the issue and follow proper safety precautions before attempting any repairs.
Sometimes, professional help or replacing the entire motor might be necessary.
Regular maintenance and following the manufacturer’s guidelines can significantly extend the life of your power drill and ensure its optimal performance. So, always refer to these tips and keep your power drill in good condition for all your DIY projects!
